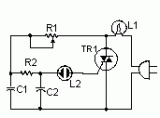
Ideal to operate 3 to 24V DC existing on-circuit lamps
LED operation is also possible
Parts:
R1 6K8 1/4W Resistor
R2 270K 1/4W Resistor
R3 22K 1/4W Resistor
C1 220µF 25V Electrolytic Capacitor
C2 10µF 25V Electrolytic Capacitor
D1 1N4002 100V 1A Diode
Q1 BC557 45V 100mA PNP Transistor
Q2 BD139 80V 1.5A NPN Transistor
LP1 Existing filament Lamp: any type in the range 3-24V 10W max.
SW1 Existing On-Off switch
B1 Existing V DC source: any type in the range 3-24V
suited to the lamp adopted
Device purpose:
This circuit has been designed to provide that continuous light lamps already wired into a circuit, become flashing. Simply insert the circuit between existing lamp and negative supply.
Especially suited for car or panel pilot lights, this device can drive lamps up to 10W.
Notes:
Break lamp(s) to negative supply connection(s), then insert the circuit between existing lamp(s) connection(s) and negative supply (respecting polarities!).
C1 value can be varied from 100 to 1000µF or higher, in order to change flashing frequency.
Although rather oversized, this circuit can also drive any LED, providing a suitable resistor is fitted in series with the light emitting device.
The resistor should be in the range 47R to 2K2, depending on supply voltag
Author: RED Free Circuit Designs
Email:
Website: http://www.redcircuits.com/

 Audio
Audio


